Warning: This blog post references deprecated XetHub links and functionality. Please use as a reference only and follow our current work on Hugging Face.
September 14, 2023
Use Branches to Version & Compare ML Models


This post is part 2 of a 4-part series that showcases how to streamline the ML model iteration workflow using XetHub. Part 1 can be found here.
At XetHub, we’re passionate about simplifying the ML model development workflow. We’ve built a storage platform with version control and data deduplication built in.
In part 1 of this series, I discussed how many ML teams end up gluing together a complex set of tools and how XetHub can radically simplify the ML model development stack.
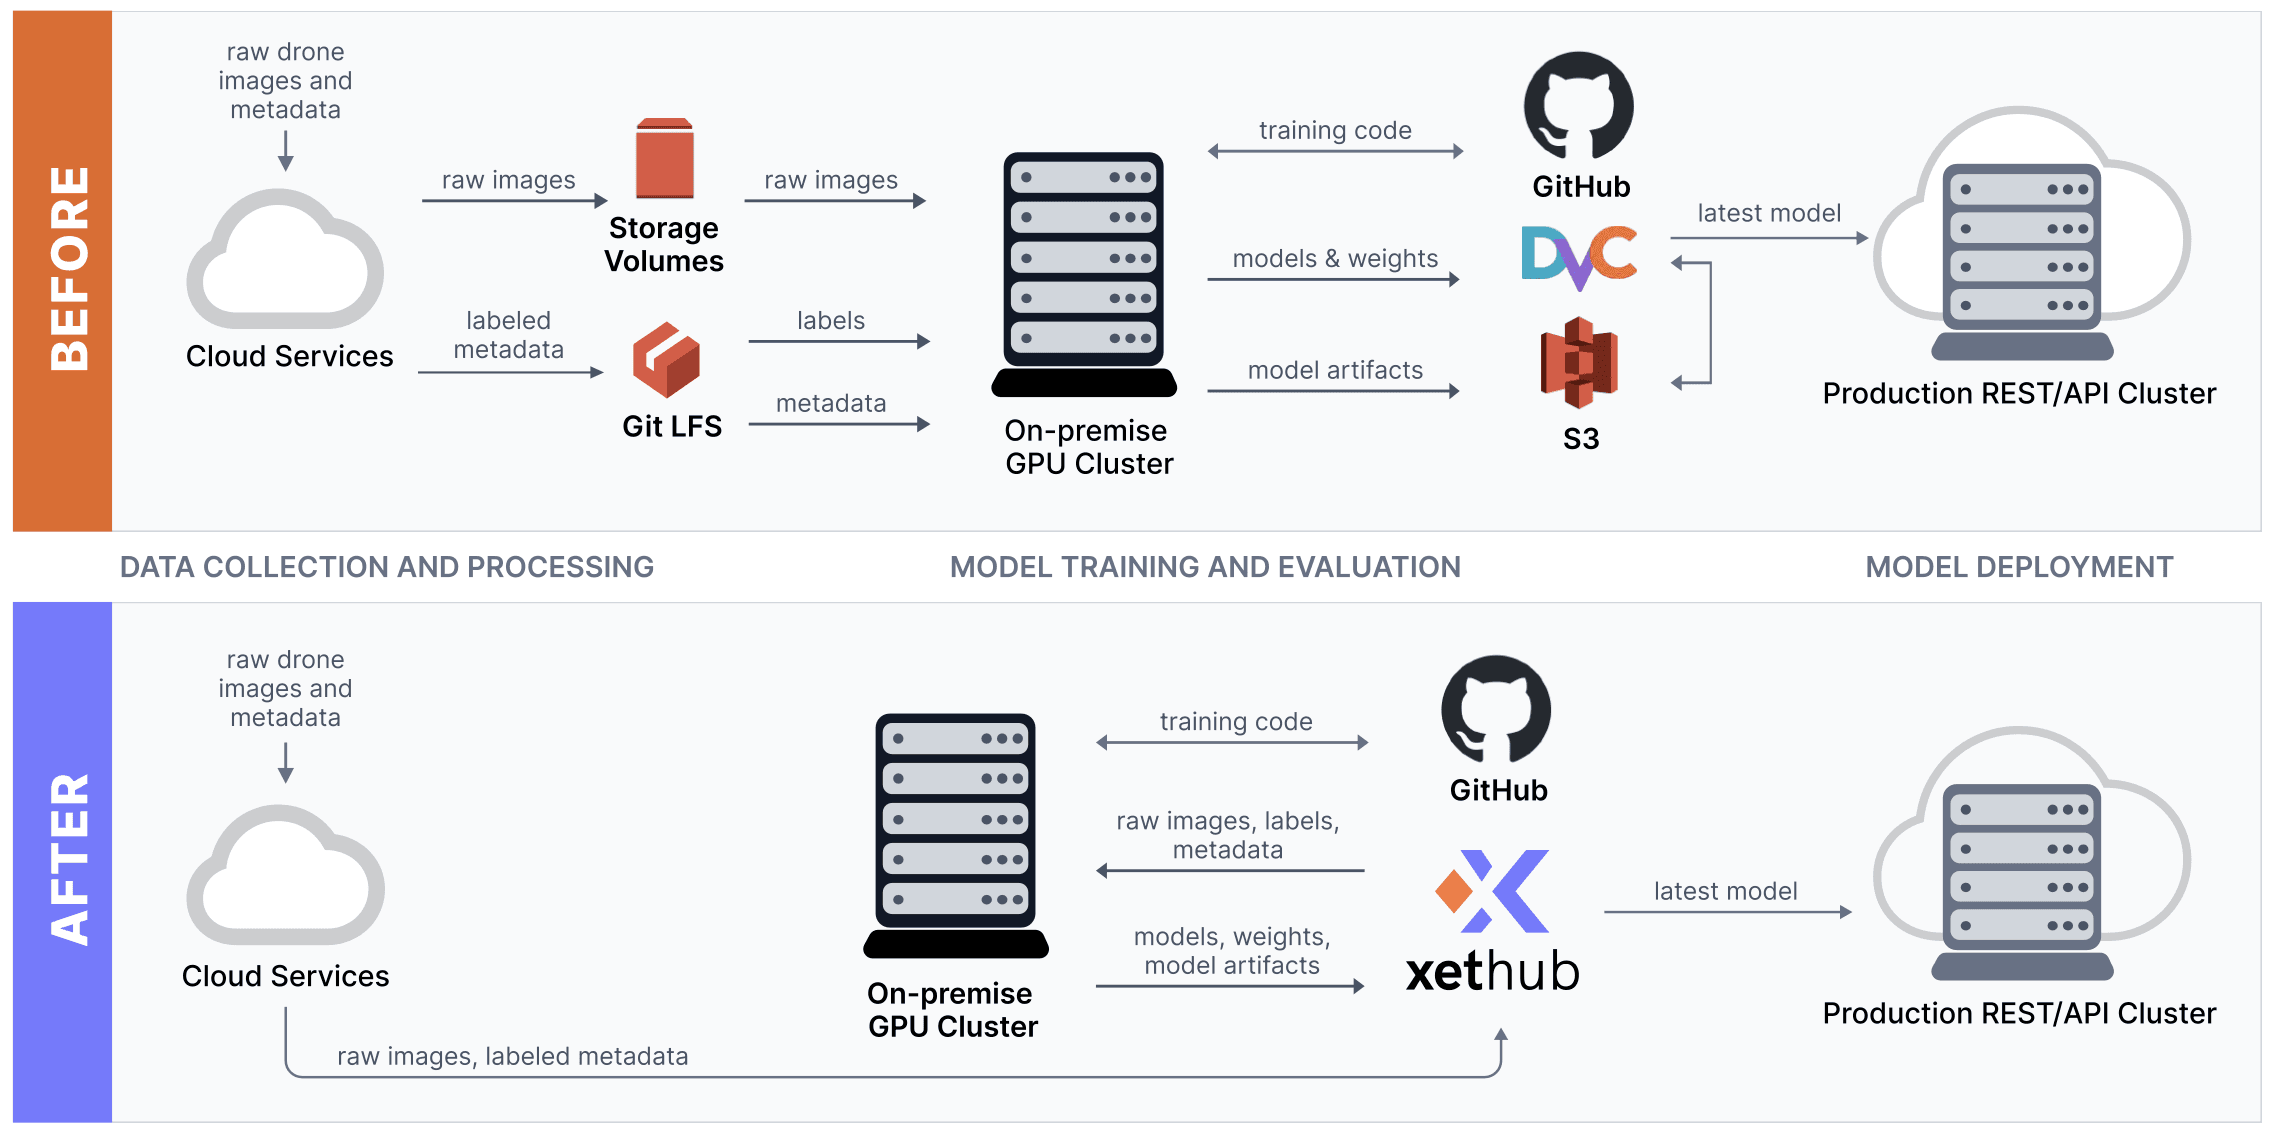
Then, I went deep into navigating XetHub repos from the command line, importing datasets from S3 into your repos, and quickly previewing & exploring large, remote datasets locally.
In this post, I’ll walkthrough a few iterations of the ML model experimentation workflow in XetHub and introduce some new features along the way. By the end of this post, you’ll be able to:
use branches to effortlessly track model experiments
compare model experiments between branches
time travel across commits in a repo
We've also recorded a companion YouTube video to give you a flavor for the branching workflow in XetHub:
🔨 Setup
Titanic Prediction Problem
For this post, we’ll use the classic Titanic dataset & prediction problem that Kaggle popularized.

Throughout this post, XetHub will act as our versioned blob store for our datasets and model artifacts. The goal is to see if we can predict who will survive the fateful Titanic crash from just the attributes of the passengers. Here’s a preview of some of the features we can use for modeling:
pclass: Ticket class
sex: Sex
age: Age in years
sibsp: # of siblings or spouses aboard the titanic
The outcome column is survival, which is either 0 for Not Survived or 1 for Survived.
Here's a link to the final Jupyter Notebook we create in this blog post, if you prefer to copy and paste from there.
Preparing our Repo
Let’s first create a new folder for our ML project locally:
Then, let’s register a remote XetHub repo to store our datasets & model artifacts using the xet CLI:
Next, let’s create a new Python virtual environment and install dependencies. We use scikit-learn in our examples because of it’s minimal footprint and easy installation. We'll end by starting a Jupyter Notebook session.
Importing Libraries
Next, let’s download the titanic.csv file from the XetHub hosted version of the dataset into our project folder.
Using the IPython shell or Jupyter Notebook, run the following lines of code to prepare us for training our first model.
Let’s populate the main branch of our titanic repo with just the titanic.csv file. Note that this doesn’t affect the state of our local project folder at all. Run the following command from your shell / command line.
🧪 Model Experimentation Using Branches
XetHub repos have branching built in, similar to branching in git. We generally recommend creating a separate branch for each unique machine learning model that you train and test.
Experiment 1: Simple Logistic Regression
Let’s first create a branch using the xet command line off of the main branch (which is created by default):
The first model we’ll train is a simple logistic regression model. After using the model for making predictions, we’ll generate a classification report and pivot the data into a DataFrame.
Here’s what the results DataFrame looks like:

One best practice to using branches is to bundle up all the relevant model artifacts and commit that to the remote branch (experiment-log-regression-1) that we created earlier.
The following code treats our XetHub repo as a file system, using pyxet.XetFS(). We start a transaction block, set a commit message, and save the metrics & model pickle files to specific locations in our branch.
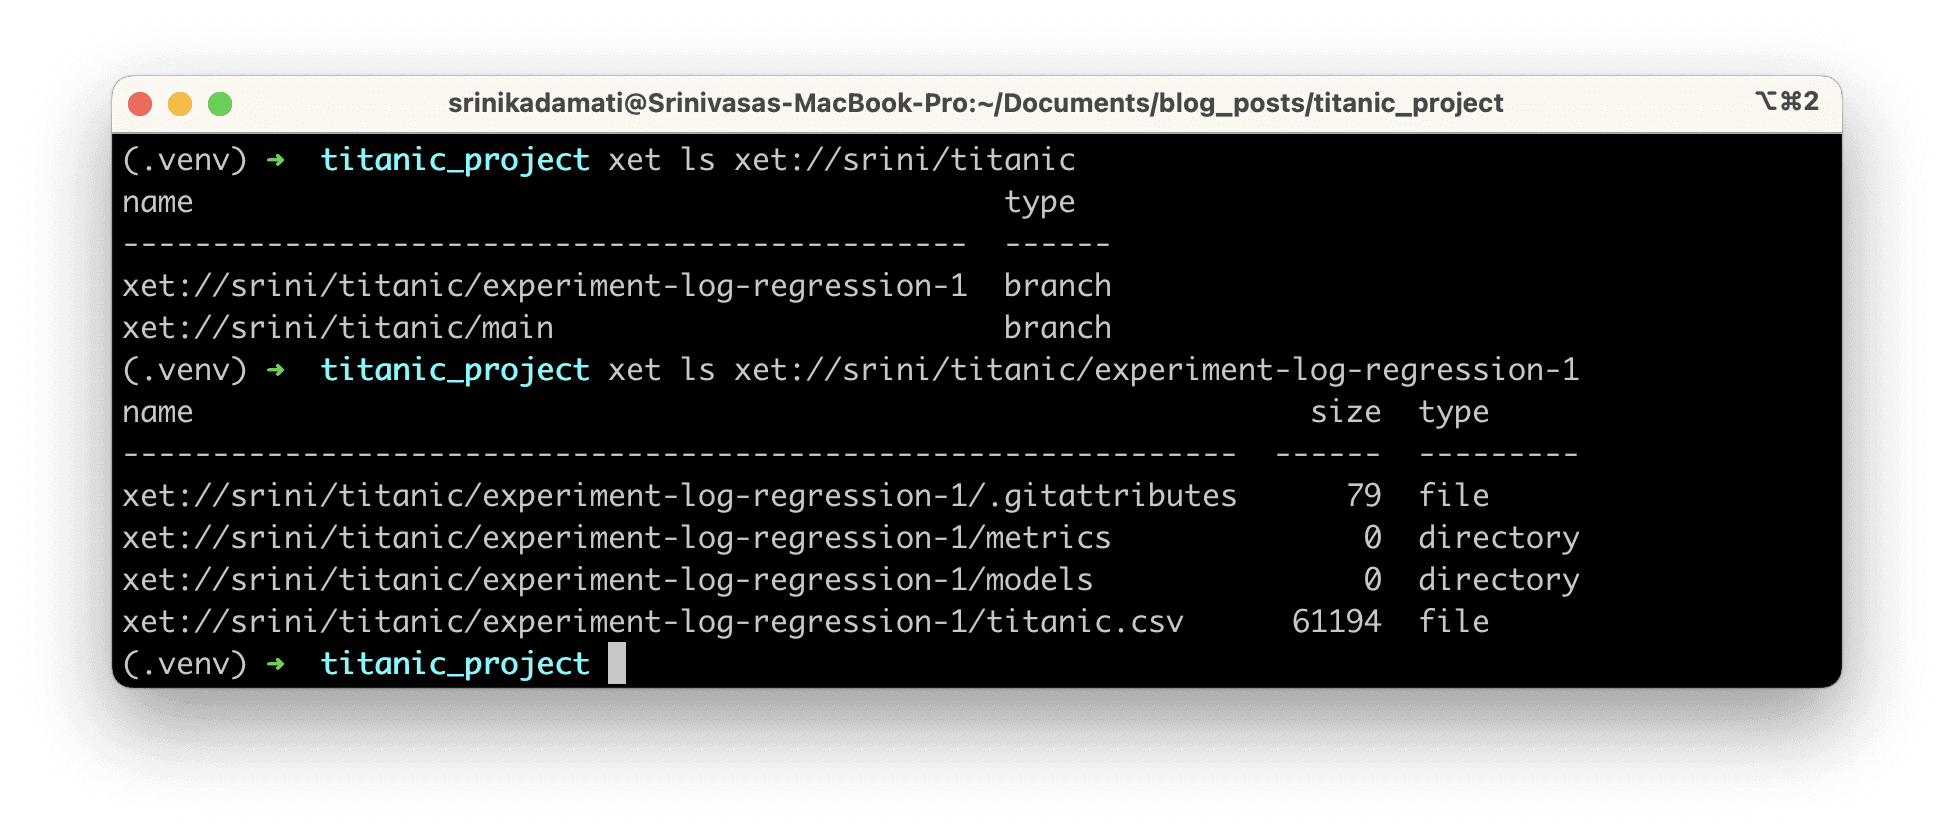
We can use xet ls to confirm the contents of this branch on XetHub:
Here’s the output:
Experiment 2: Random Forest Classification Model
Let’s now try a random forest model! We can either:
Replace the single line of code from earlier and modify it in-place to train a different model
Keep the logistic regression code and copy, paste, and modify the code to train a different model below the original code
For large projects where you may train hundreds of different models, I recommend the first approach. For smaller projects where you may only train a handful of models, I recommend the second approach!
First, let’s create a new branch from the command line:
Let’s now use the RandomForestClassifier class from scikit-learn to replace the LogisticRegression model.
Just like the previous model, let’s commit these new assets to the branch remotely.
⏰ Comparing Models Between Branches
Being able to reference and load files from different branches is a unique and powerful capability of XetHub that enables you to compare experiments in lightweight ways without adding a new tool entirely.
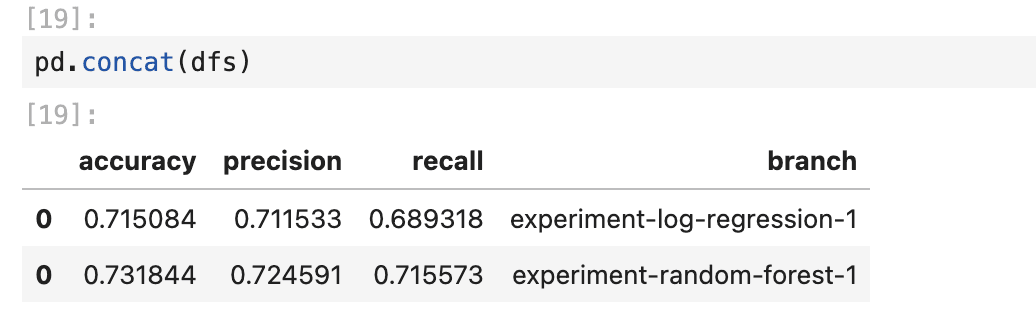
In the following code block, we append values from metrics.csv that reside in the 2 model branches we created earlier.
This is what the output looks like:
Once you find the highest performing model, you can even load that model directly from any computing environment that can authenticate to XetHub. This makes the transition from ML model development to production incredibly smooth while still preserving the data & model context needed to generate the model.
As we mentioned earlier, all of the code for this Titanic prediction project can be found in my XetHub repo for you to download.
📝 Time Travel Between Commits
As the number of datasets and models n your repo grow and evolve, it’s helpful to be able to view the state of the repo at any point in it’s history.
Imagine a scenario where you’ve improved a lead scoring model over many years with an increasing number of features and observations in your dataset, as well as more complex models. You may have questions like:
How has overall model performance improved since we started 6 months ago until now?
How have the number of observations in our training dataset increased in the last month?
To answer these types of questions, XetHub supports time travel between commits and it’s built right into the xet ls command.
Time Travel Entire Repo
Being able to visit the past state of a repo helps you quickly understand how far your work has come. To run xet ls against a past state of a repo, include @{timedelta} at the end of the branch when referencing a repo. Here’s an example you can run against my public repo:
This will return a full list of the flies, folders, and sizes from that time:
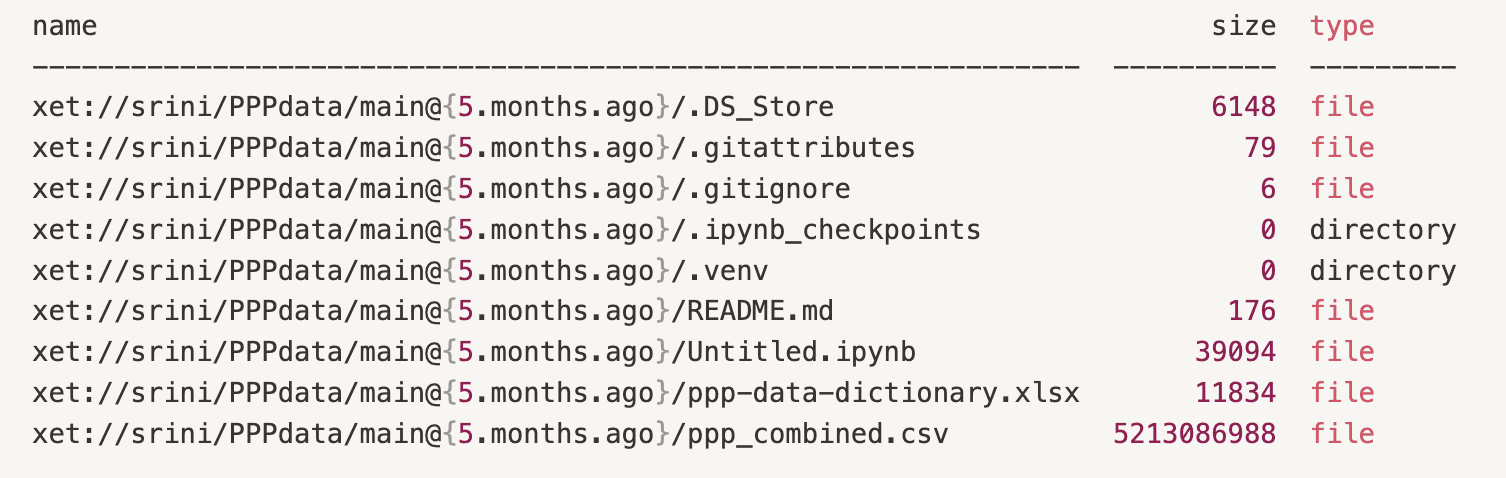
We can compare that to the current state of the repo by running xet ls xet://srini/PPPdata/main:
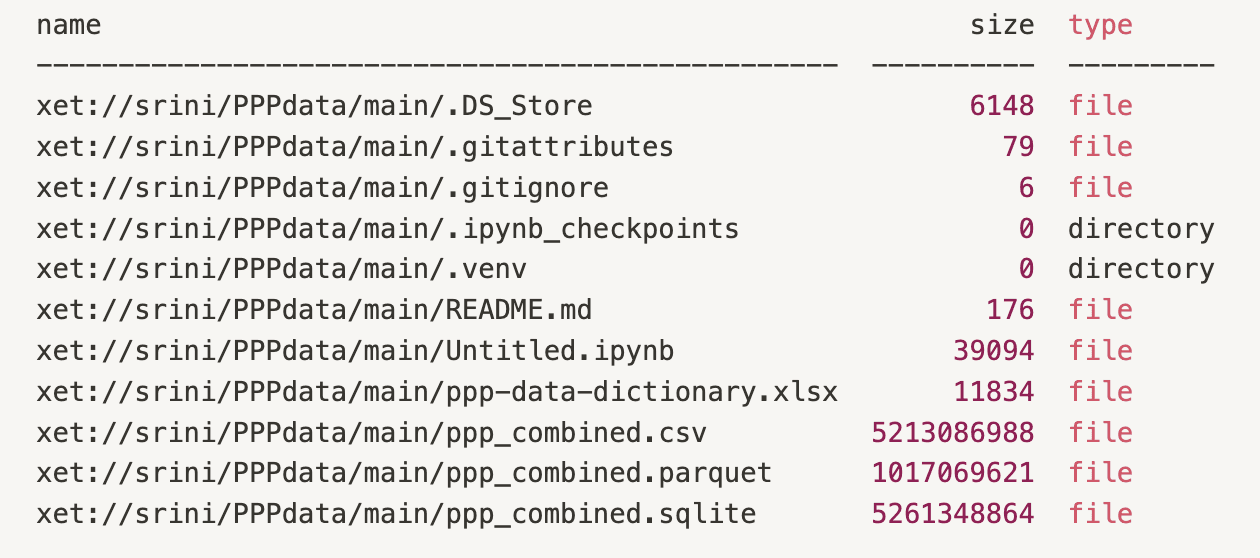
We can see that sqlite and parquet versions of ppp_combined.csv were added to the repo.
Time Travel for a Specific File
Let’s say that once a month, we receive new observations and our train.csv grows because of it:
This command will return information on the size of that file currently in main:

We can compare that value to the size today:
This may return something like:

And of course, all of this works in your Python code, Jupyter Notebook, etc.
If you prefer, you can reference specific datetime values instead. In the following code snippet, we reference the version of train.csv from 2023-07-04 12:00:
Time travel in XetHub can be combined with other commands like xet cp and xet mv (to move files from 1 commit-branch to another). You can learn more about the other commands in the PyXet documentation.
Next Steps
In this post, we dived deeper into the specific version control features that XetHub offers to augment the machine learning workflow. We showcased how to use branches to track and compare ML models and how to time travel between commits. You can learn more about the specific commands in our documentation.
In the next post, we’ll shift gears to what collaboration on XetHub looks like. We’ll showcase how to build custom visualizations that live in your repo, how to build and deploy Streamlit & Gradio apps, and more.
If you have questions or run into issues, join our Slack community to meet us and other XetHub users!
Share on